Timer 与按键消抖的应用
本小节教你使用 STM32CubeMX 软件配置 MiaowLabs-STM32F1-Micro 核心板按键引脚的底层驱动,并使用 MDK-ARM 5.17 编写代码识别用户按键的单击动作,实现使用按键控制 LED 的亮灭功能。
在上一小节中,我们使用 STM32CubeMX 软件配置 MiaowLabs-STM32F1-Micro 核心板的底层驱动,并使用 MDK-ARM 5.17 编写代码点亮板子上的的蓝色 LED。在这一小节,我将继续教你实现使用按键控制 LED 的亮灭功能。
预先了解
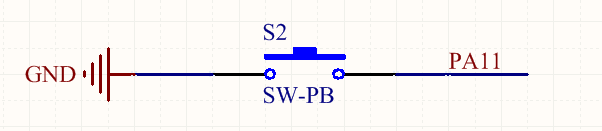
MiaowLabs-STM32F1-Micro 核心板板上面有一颗用户按钮 是跟 STM32 的 PA11 引脚相连。我们可以通过编写代码识别按键的单击,当 PA11 引脚为低电平时,识别为按下按键;当 PA11 引脚为高电平时,识别为按下按键。
具体步骤
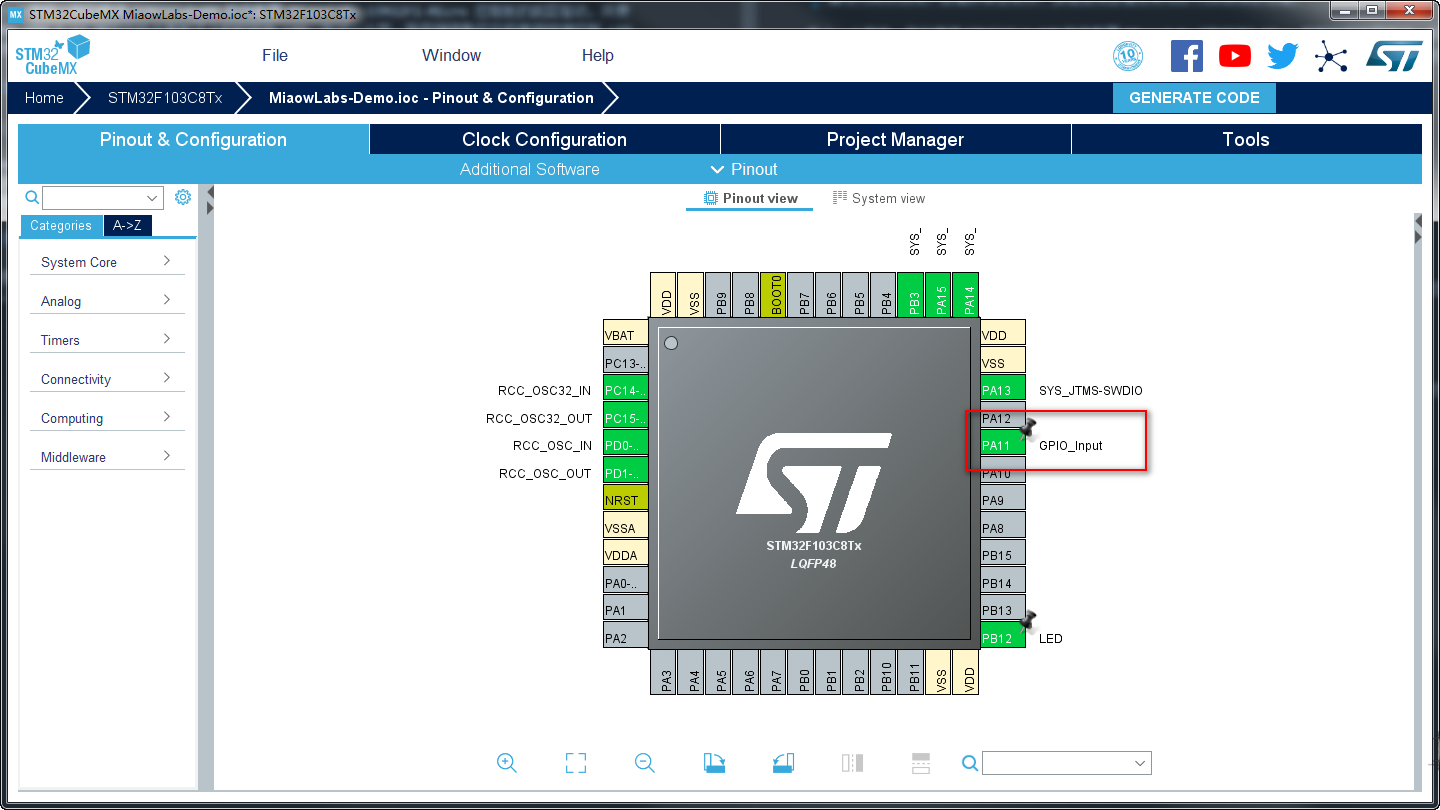
进入我们上一小节修改过的 MiaowLabs-Demo 文件夹,找到 MiaowLabs-Demo.ioc 工程文件,双击,打开工程。在 Pinout&Configuration 界面中的芯片中点击 PA11,并将其配置为 GPIO_Input。
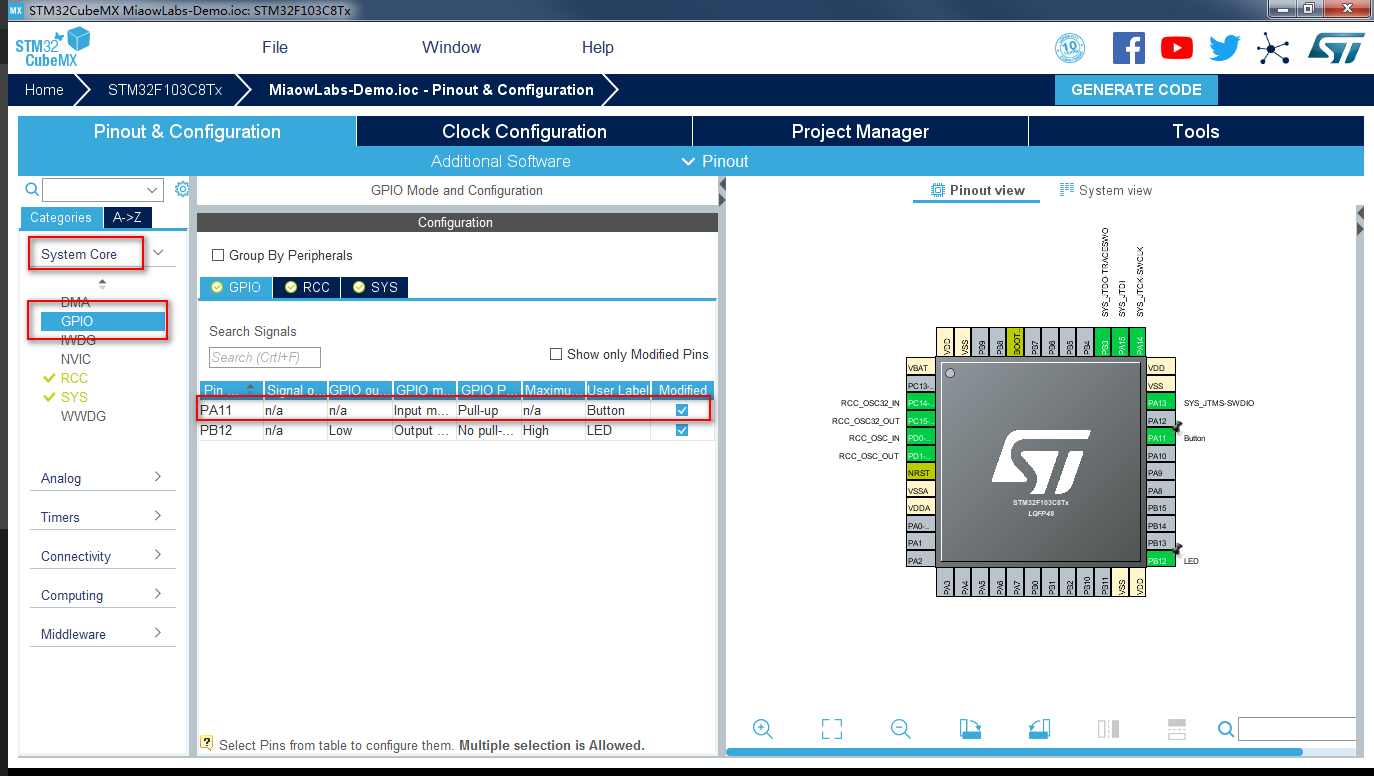
在左侧的 System Core 下拉菜单中选择 GPIO,然后在 GPIO Mode and Configuration 中对 PA11 引脚进行配置,GPIO mode 代表 GPIO 引脚模式,在这里设置为输入模式;GPIO Pull-up/Pull-down 即 GPIO 上拉或下拉,根据硬件实际情况,在这里设置为上拉;User Label 即用户标签,因为 PA11 在这里的功能是识别按键,所以输入 Button 作为标签。
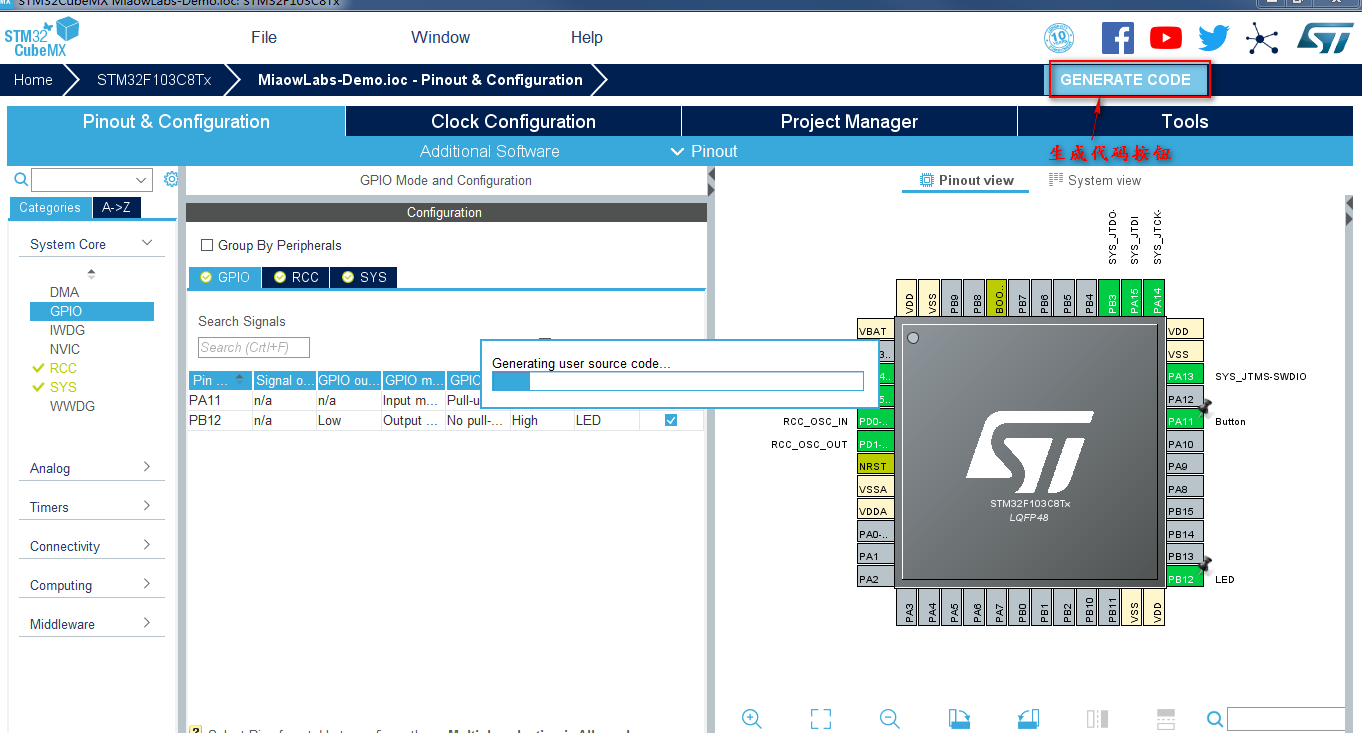
点击 GENERATE CODE,重新生成代码。
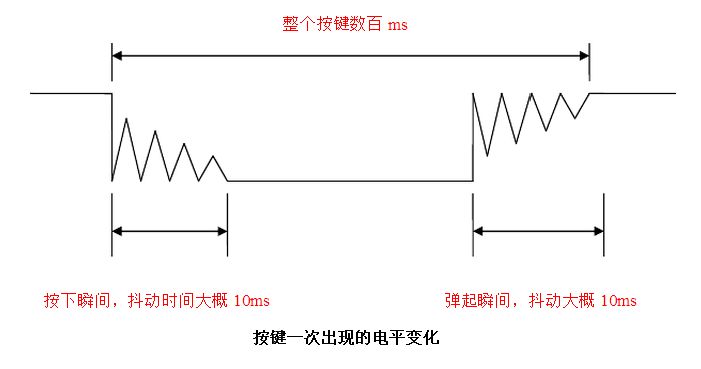
因为通常的按键所用开关为机械弹性开关,当机械触点断开、闭合时,由于机械触点的弹性作用,一个按键开关在闭合时不会马上稳定地接通,在断开时也不会一下子断开。因而在闭合及断开的瞬间均伴随有一连串的抖动,为了不产生这种现象而作的措施就是按键消抖。
消抖是为了避免在按键按下或是抬起时电平剧烈抖动带来的影响。按键的消抖,可用硬件或软件两种方法,在实际的设计中,为了节省硬件成本,大多数情况会选择使用软件消抖。
延时消抖
软件消抖,即检测出按键闭合后执行一个延时程序,5ms~10ms 的延时,让前沿抖动消失后再一次检测键的状态,如果仍保持闭合状态电平,则确认为真正有键按下。当检测到按键释放后,也要给 5ms~10ms 的延时,待后沿抖动消失后才能转入该键的处理程序。
以前常用的消抖算法往往就是:判断按下->延时->再次判断是否按下->是,执行/否,退出。
最简单的消抖原理,就是当检测到按键状态变化后,先等待一个 10ms 左右的延时时间,让抖动消失后再进行一次按键状态检测,如果与刚才检测到的状态相同,就可以确认按键已经稳定的动作了。
 //按键处理函数
void ButtonScan(void)
{
    static int ButtonFlag = 0;//按键标志,1代表松开,0代表按下

    if(Button == 0)//第一次判断按键按下
    {
        delay_ms(10);//延时10ms,去抖动
        if(Button == 0)//第二次判断按键按下
        {
            ButtonFlag = 1;    //确认按键为按下,按键标志置1
        }
}
利用定时器消抖
利用定时器消抖算法:通过 SysTick 中断每1ms对按键进行扫描,当检测到连续的稳定无抖动电平信号(长度可设置)之后,才进行相应的逻辑操作。
我们启用一个定时中断,每 1ms 进一次中断,扫描一次按键状态并且存储起来,连续扫描 25 次后,看看这连续 25 次的按键状态是否是一致的。25 次按键的时间是 25ms,这 25ms 内如果按键状态一直保持一致,那就可以确定现在按键处于稳定的阶段,而非处于抖动的阶段。
我们在上一小节中已经对 SYS 进行了配置。
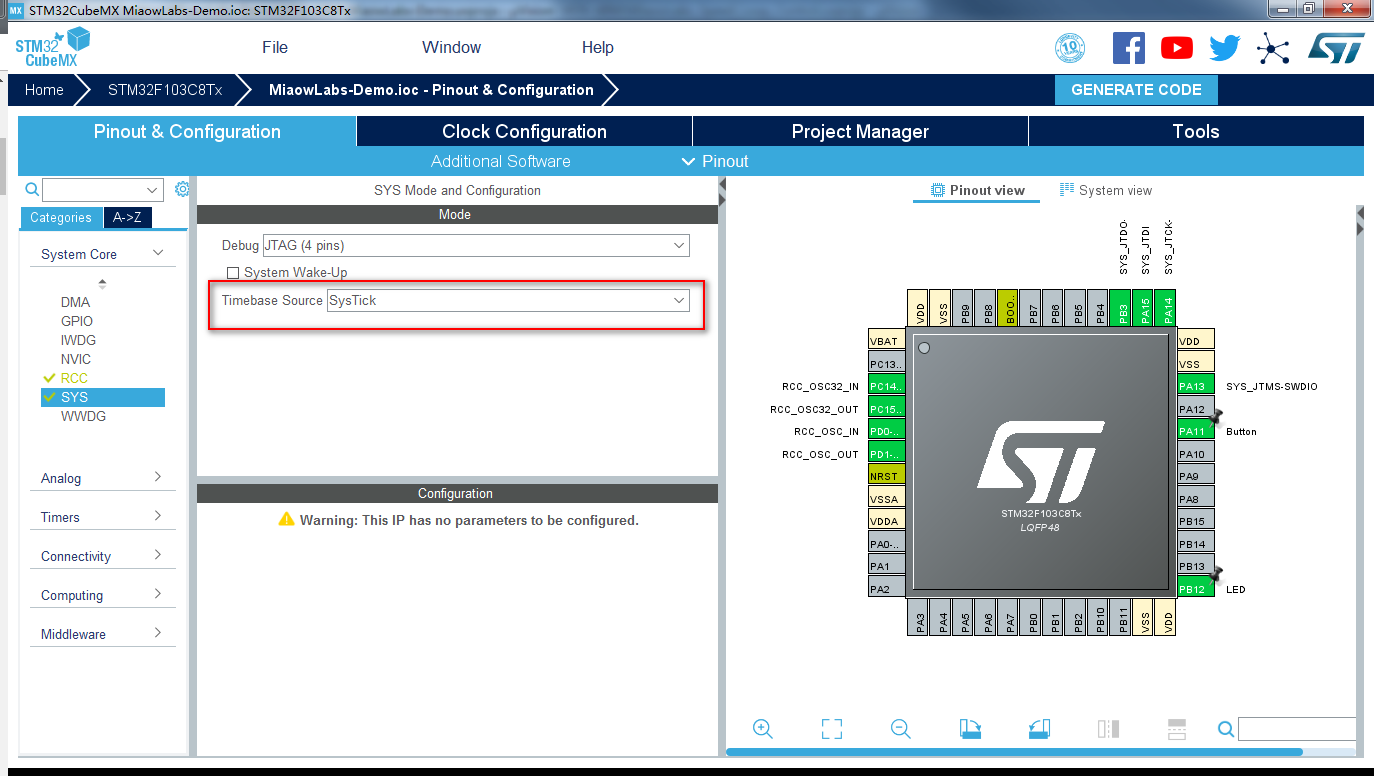
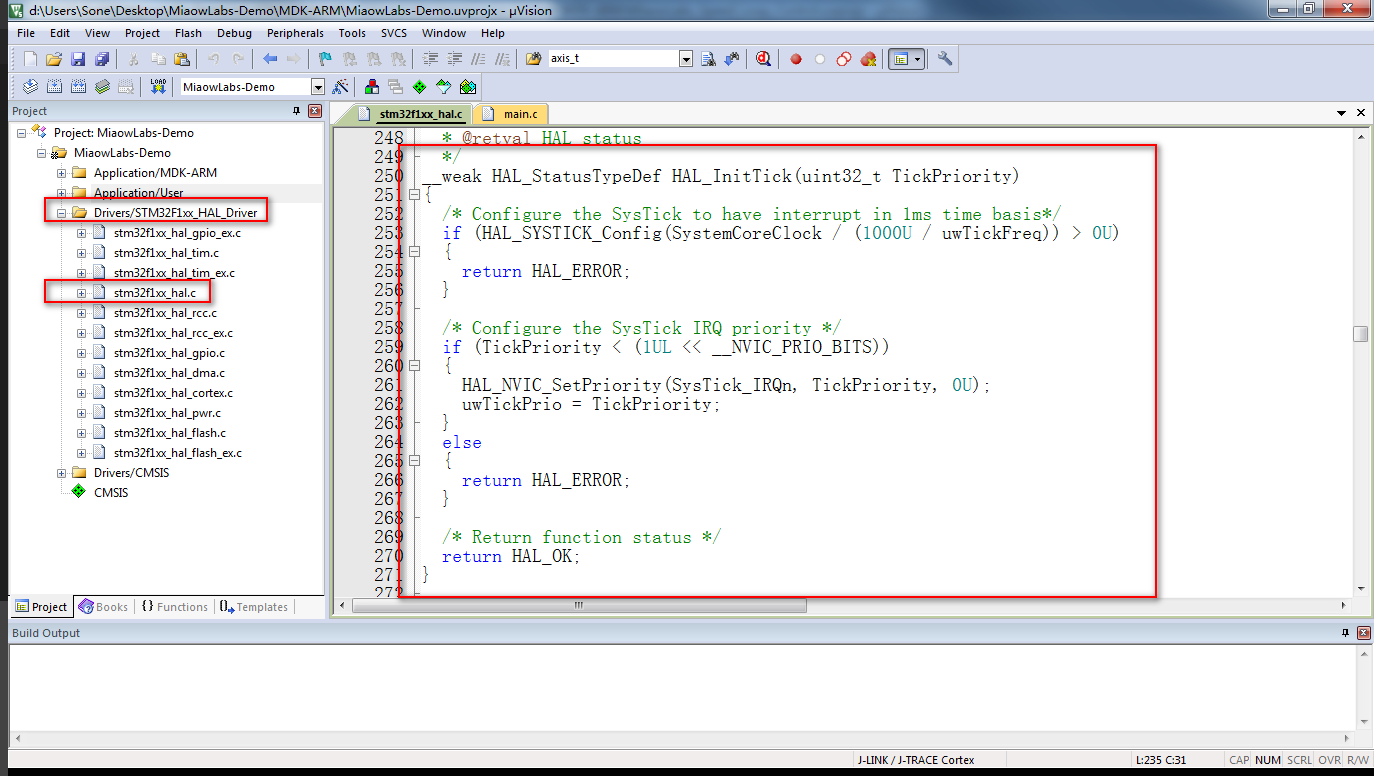
在 STM32CubeMX 中,默认 SysTick 中断为 1ms。 我们可以打开 MDK-ARM 工程,在左侧 Drivers/STM32F1xx_HAL_Driver 文件夹的 stm32f1xx_hal.c 文件中找到 SysTick 的初始化。
/**
  * @brief This function configures the source of the time base.
  *        The time source is configured  to have 1ms time base with a dedicated
  *        Tick interrupt priority.
  * @note This function is called  automatically at the beginning of program after
  *       reset by HAL_Init() or at any time when clock is reconfigured  by HAL_RCC_ClockConfig().
  * @note In the default implementation, SysTick timer is the source of time base.
  *       It is used to generate interrupts at regular time intervals.
  *       Care must be taken if HAL_Delay() is called from a peripheral ISR process,
  *       The SysTick interrupt must have higher priority (numerically lower)
  *       than the peripheral interrupt. Otherwise the caller ISR process will be blocked.
  *       The function is declared as __weak  to be overwritten  in case of other
  *       implementation  in user file.
  * @param TickPriority Tick interrupt priority.
  * @retval HAL status
  */
__weak HAL_StatusTypeDef HAL_InitTick(uint32_t TickPriority)
{
  /* Configure the SysTick to have interrupt in 1ms time basis*/
  if (HAL_SYSTICK_Config(SystemCoreClock / (1000U / uwTickFreq)) > 0U)
  {
    return HAL_ERROR;
  }

  /* Configure the SysTick IRQ priority */
  if (TickPriority < (1UL << __NVIC_PRIO_BITS))
  {
    HAL_NVIC_SetPriority(SysTick_IRQn, TickPriority, 0U);
    uwTickPrio = TickPriority;
  }
  else
  {
    return HAL_ERROR;
  }

  /* Return function status */
  return HAL_OK;
}
函数里面有一句注释: /* Configure the SysTick to have interrupt in 1ms time basis*/,翻译过来就是,将 SysTick 配置为 1ms 中断。也就是说,经过此函数,SysTick 定时器被初始化为 1ms 的时基单元,即每毫秒进入一次 Systick 中断。
我们可以在左侧 Application/User 文件夹的 stm32f1xx_it.c 文件中找到 SysTick 中断服务函数。

/**
  * @brief This function handles System tick timer.
  */
void SysTick_Handler(void)
{
  /* USER CODE BEGIN SysTick_IRQn 0 */

  /* USER CODE END SysTick_IRQn 0 */
  HAL_IncTick();
  /* USER CODE BEGIN SysTick_IRQn 1 */

  /* USER CODE END SysTick_IRQn 1 */
}
里面只有一个 HAL_IncTick() 函数,我们右键转跳到该函数可以看到该函数的定义。
/**
  * @brief This function is called to increment  a global variable "uwTick"
  *        used as application time base.
  * @note In the default implementation, this variable is incremented each 1ms
  *       in SysTick ISR.
  * @note This function is declared as __weak to be overwritten in case of other
  *      implementations in user file.
  * @retval None
  */
__weak void HAL_IncTick(void)
{
  uwTick += uwTickFreq;
}
每毫秒 uwTick 加一,用于计算 Systick 产生的节拍数。
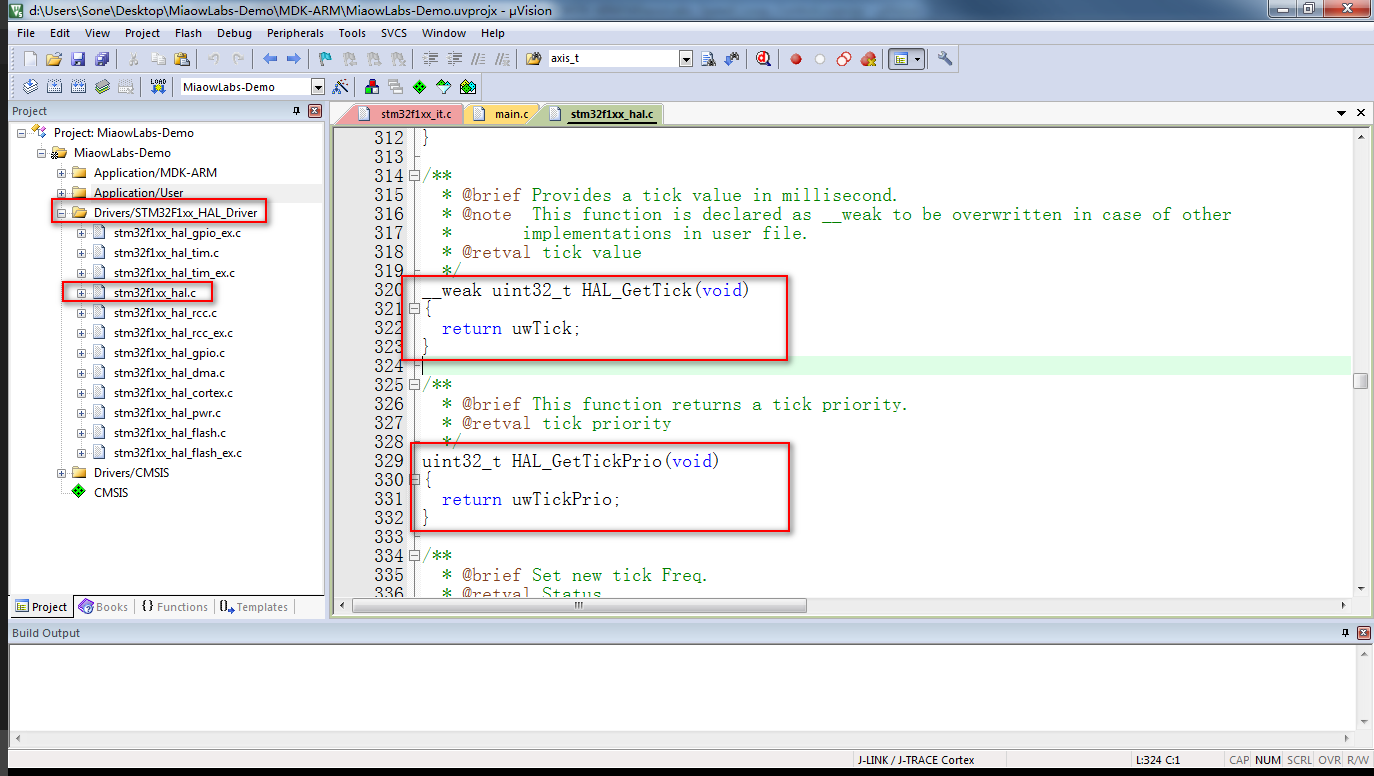
在 HAL_IncTick 函数的下方有一个 HAL_GetTick(void) 函数,主要用于获取当前节拍,如果内核正常运行,则 uwTick 的值即为已经经过的 ms 数。
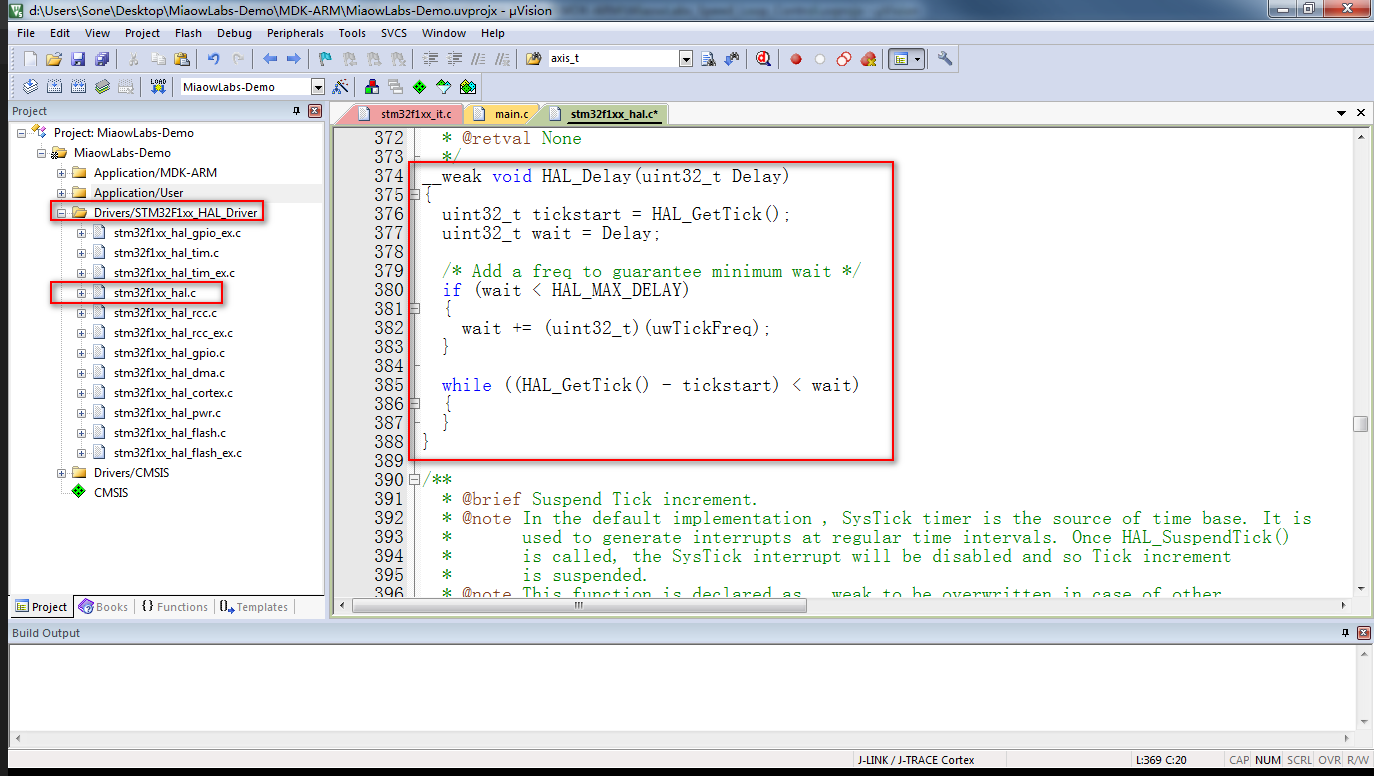
这里顺便提及一下 HAL 库的延时函数 HAL_Delay() 。在左侧 Drivers/STM32F1xx_HAL_Driver 文件夹的 stm32f1xx_hal.c 文件中找到 HAL_Delay() 函数。
/**
  * @brief This function provides minimum delay (in milliseconds) based
  *        on variable incremented.
  * @note In the default implementation , SysTick timer is the source of time base.
  *       It is used to generate interrupts at regular time intervals where uwTick
  *       is incremented.
  * @note This function is declared as __weak to be overwritten in case of other
  *       implementations in user file.
  * @param Delay specifies the delay time length, in milliseconds.
  * @retval None
  */
__weak void HAL_Delay(uint32_t Delay)
{
  uint32_t tickstart = HAL_GetTick();
  uint32_t wait = Delay;

  /* Add a freq to guarantee minimum wait */
  if (wait < HAL_MAX_DELAY)
  {
    wait += (uint32_t)(uwTickFreq);
  }

  while ((HAL_GetTick() - tickstart) < wait)
  {
  }
}
可以看到 HAL_Delay() 函数其实就是通过 HAL_GetTick() 函数数节拍以确定精准的延时。
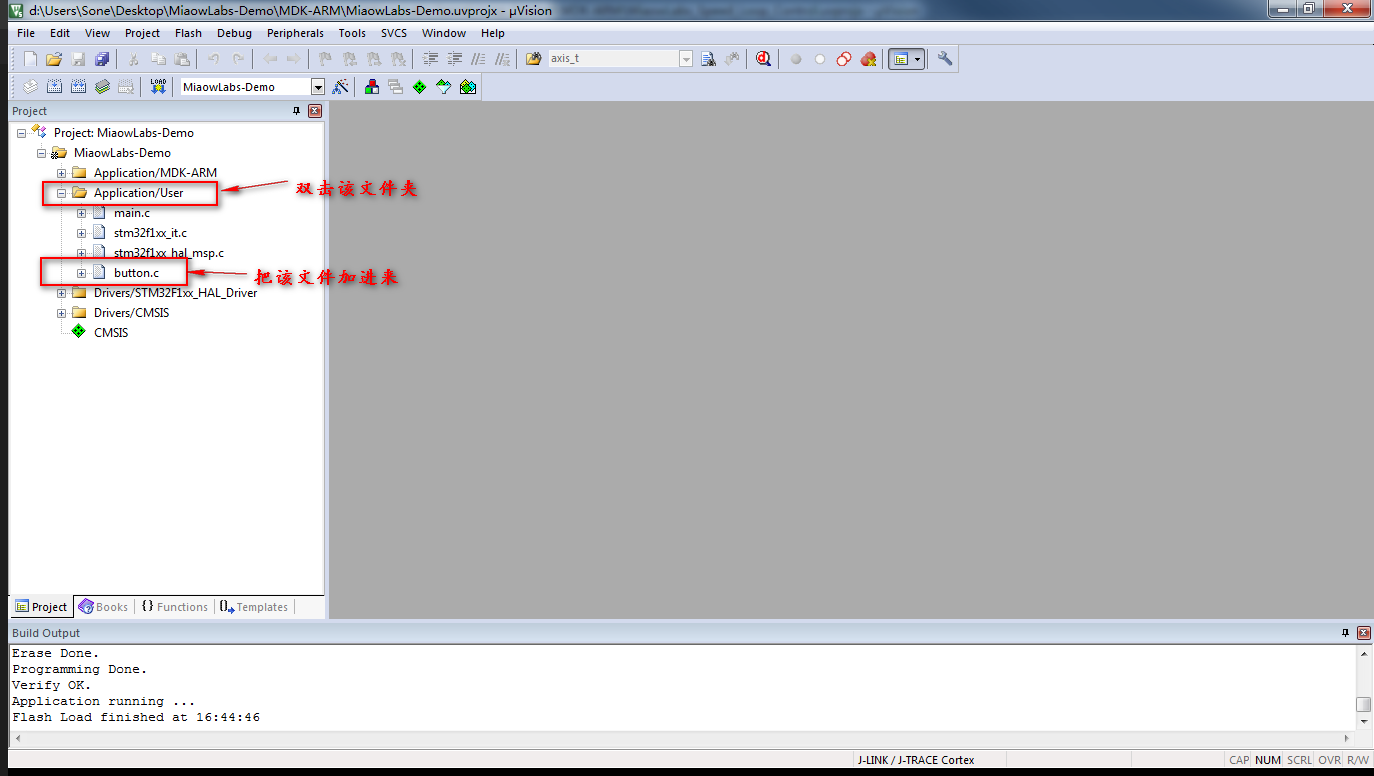
回到按键消抖的主题,既然 STM32CubeMX 已经默认设置 Systick 为 1ms 中断,那么我们可以直接利用起来。打开 MDK-ARM 工程,按下组合键 Ctrl+N(按住 Ctrl 键再按 N 键),新建一个文件,再按下组合键 Ctrl+S,文件名改为 button.c,保存到 MiaowLabs-DEMO 的 Src 文件夹里。来到这里,我们虽然新建了button.c 源文件,但是还没有把该文件加入到 MDK-ARM 工程里。我们在 MDK-ARM 工程界面左侧 Project 栏目双击 Application/User 文件夹,把 button.c 加进来。
双击 button.c 文件,把下面代码敲进去。
#include "button.h"
#include "main.h"
#include "stm32f1xx_it.h"

int iButtonCount;//i代表int型变量,ButtonCount表示按键计数变量
int iButtonFlag;//i代表int型变量,ButtonFlag表示重按键标志,1代表重新按键,0为没有重新按键
int g_iButtonState;//g是globle代表全局变量,会在其他地方引用;i代表int型变量,ButtonState表示按键标志,1代表按下,0代表松开
void ButtonScan(void){
  if(   HAL_GPIO_ReadPin(Button_GPIO_Port,Button_Pin) == GPIO_PIN_RESET )//如果引脚检测到低电平
  {
      iButtonCount++;                         //按键按下,计数iButtonCount加1
      if(iButtonCount>=30)                    //1ms中断服务函数里运行一次,iButtonCount大于等于30,即按键已稳定按下30ms
         {
            if(iButtonFlag==0)                  //判断有没有重按键,1为有,0为没有
                {
                    g_iButtonState=1;                 //设置按键标志
                    iButtonCount=0;
                    iButtonFlag=1;                  //设置重按键标志
                    }
                else                              //如果重按键,则重新计数
                    iButtonCount=0;
                }
    else                                  //如果没有稳定按下30ms,则代表没有按下按键
         g_iButtonState=0;

         }
else                                      //如果一直无检测到低电平,即一直无按键按下
    {
         iButtonCount=0;                  //清零iButtonCount
         g_iButtonState=0;                  //清除按键标志
         iButtonFlag=0;                   //清除重按键标志
    }
}

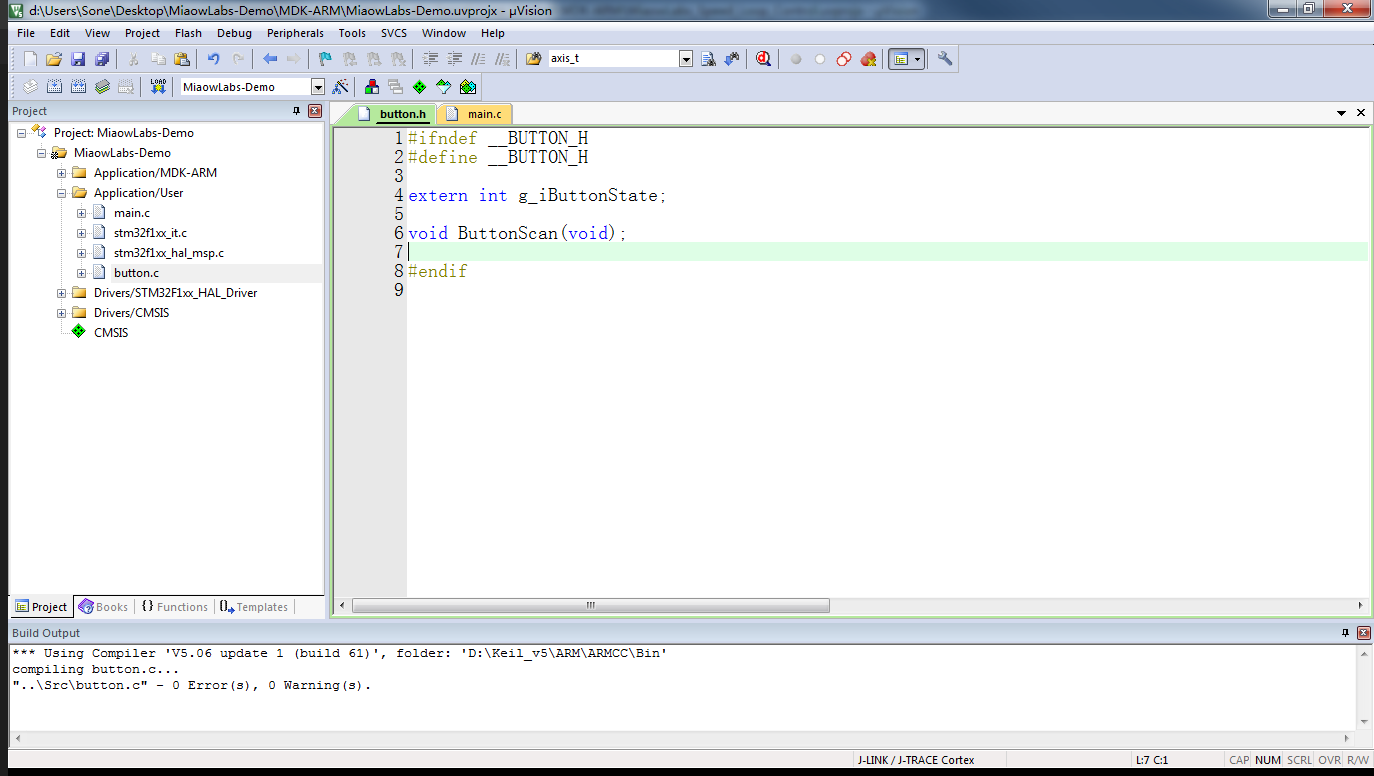
再新建一个文件 button.h 头文件,把文件保存到 Inc 文件夹。然后,把下面代码敲进去。
#ifndef __BUTTON_H
#define __BUTTON_H

extern int g_iButtonState;//声明外部变量,方便其他地方引用

void ButtonScan(void);//声明按键扫描函数

#endif
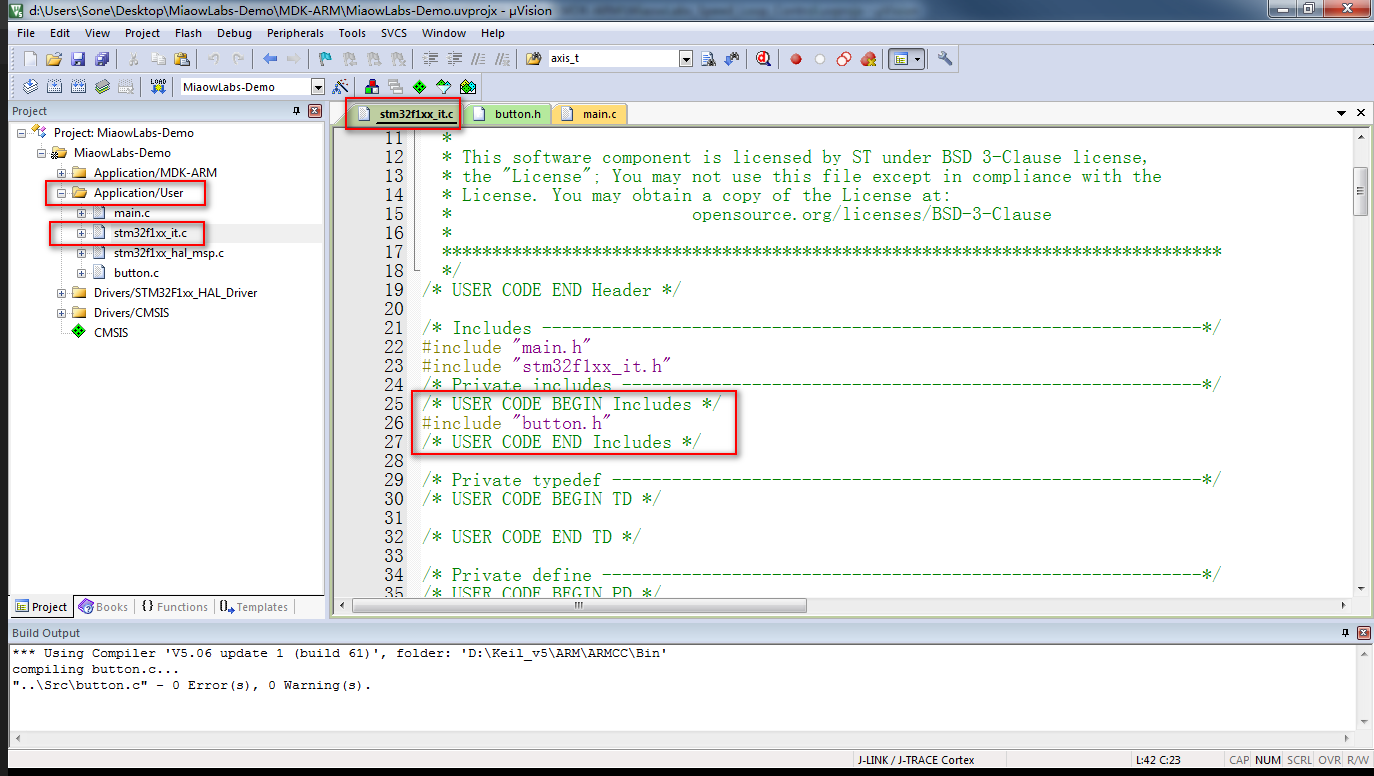
打开 stm32fxx_it.c 文件,在 /* USER CODE BEGIN Includes */ 与
/* USER CODE END Includes */ 之间加入 #include "button.h"。
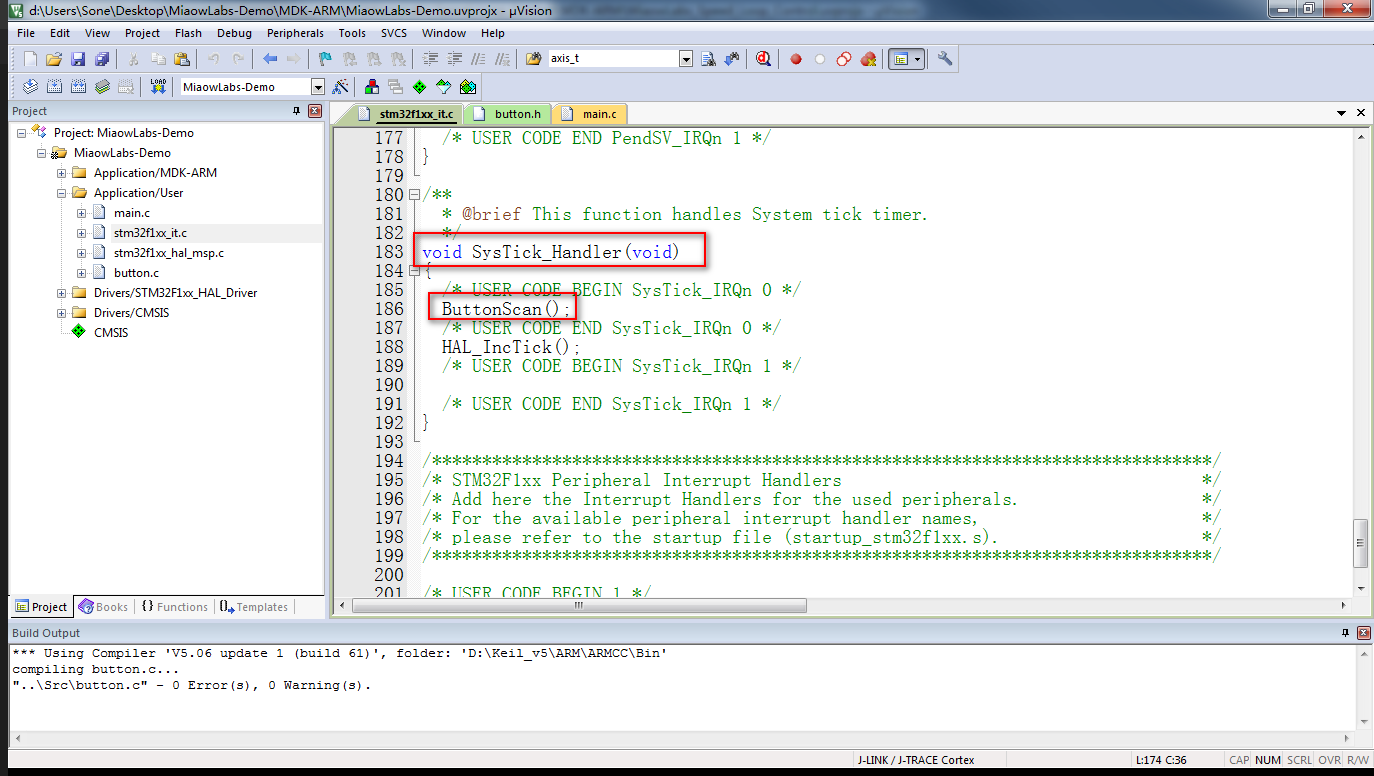
在 stm32fxx_it.c 文件里面 SysTick_Handler() 函数里加入按键扫描函数 ButtonScan()。
在左侧 Application/User 文件夹里打开 main.c 函数,在主循环里面加入以下代码:
        if(g_iButtonState == 1){
          HAL_GPIO_TogglePin(LED_GPIO_Port,LED_Pin);//翻转LED引脚(PB12)的电平
        }
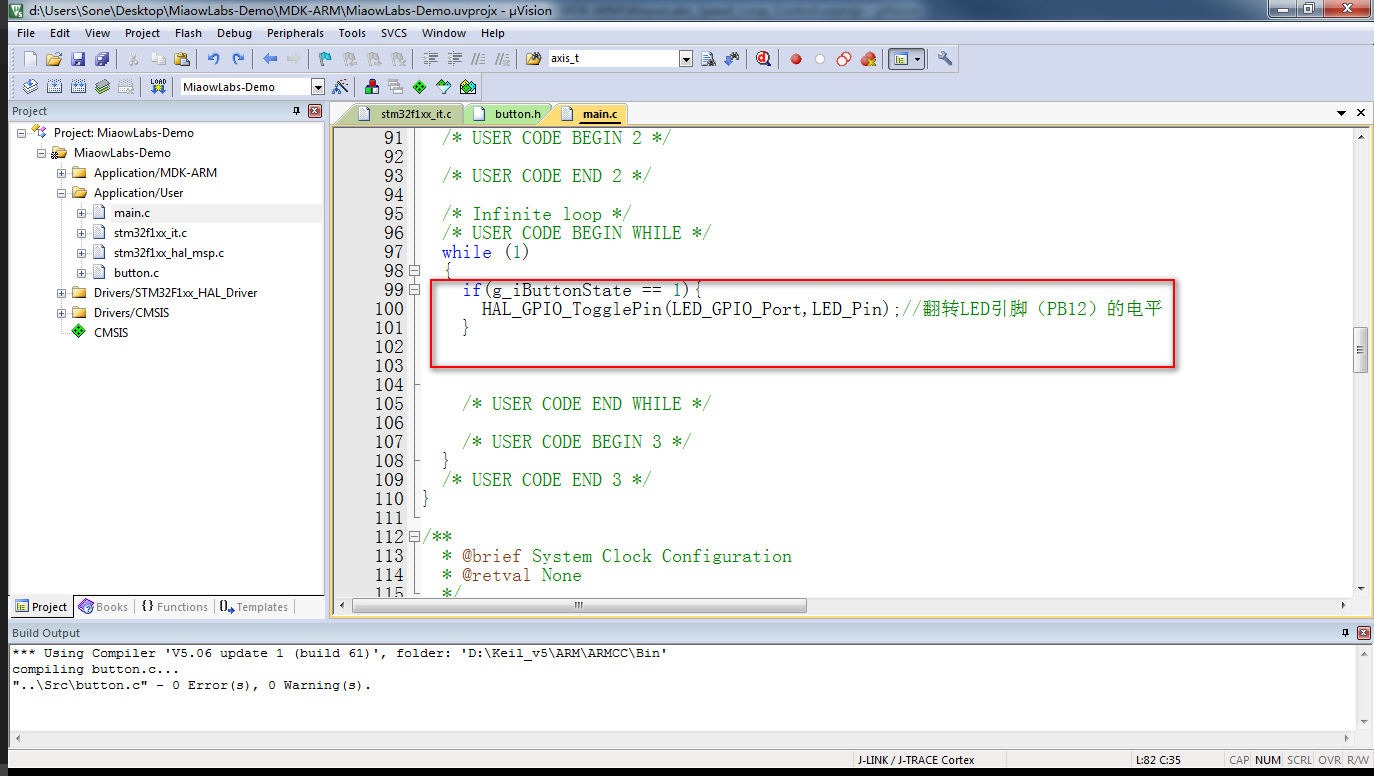
这段代码的意思就是:如果按键状态标志为 1 ,则代表按键被按下了,这时候进行 LED 电平翻转。
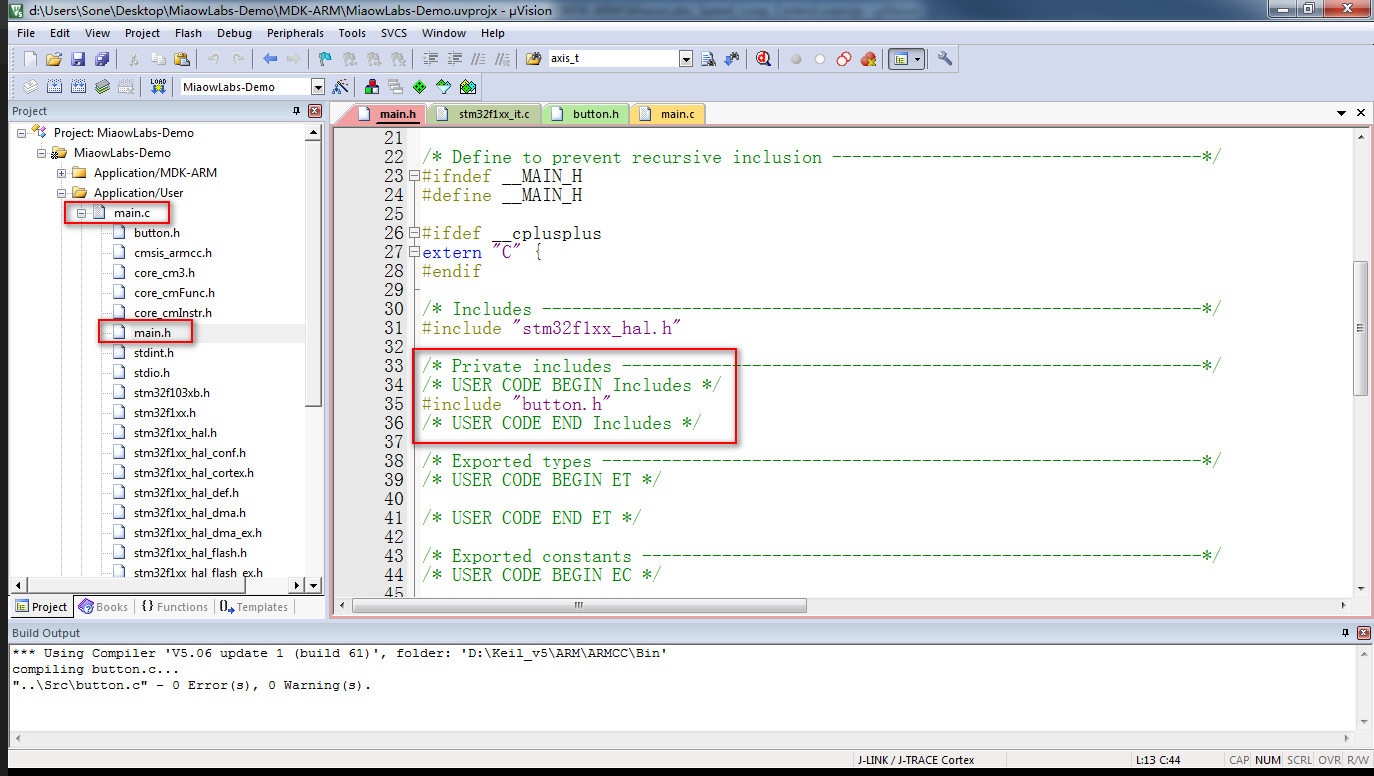
在左侧 Application/User 文件夹里点开 main.c 函数左侧的加号,找到 main.h 头文件,并把#include "button.h"头文件加进去。
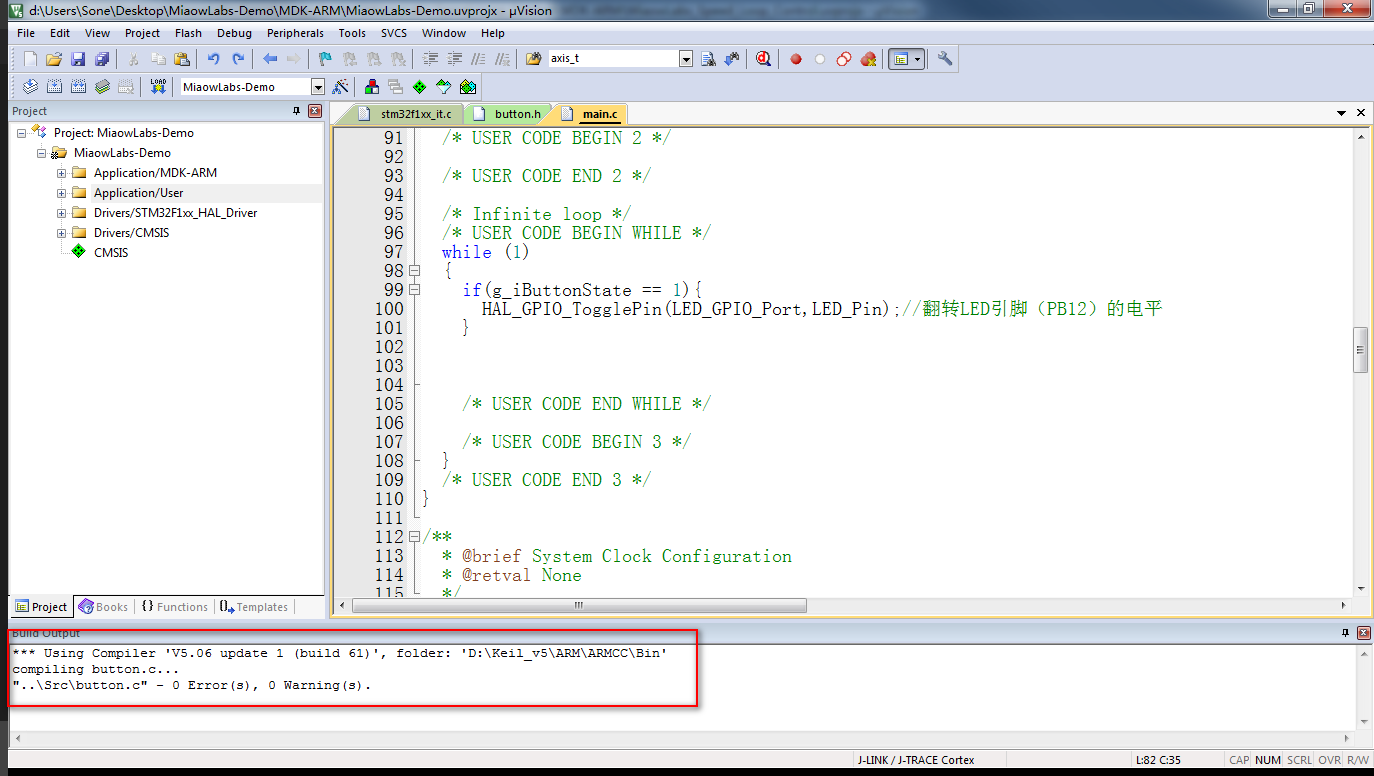
代码已经编写好了。这时候,点击编译按钮,会提示没有错误和警告。
把代码烧录进 MiaowLabs-STM32F1-Micro 核心板,然后按下用户按键,可以发现按一下 LED 会亮,再按一下 LED 就会灭掉。就这样,我们实现了通过按键控制 LED 亮灭的功能。